[Guest Blog] Do you have a boring kitchen? Give it a great new look with an easy-to-fit splashback!
Share
![[Guest Blog] Do you have a boring kitchen? Give it a great new look with an easy-to-fit splashback!](/image?w=970&h=545&fit=crop-50-50&src=staging%2Fcms%2Fprocessed%2F88a328671eeb068cdafa800d5f28c5ed.jpg&s=966a30b1d3ecabd42a299ec144375a34)
This post is a guest blog from Interior Designer/ Stylist/ Writer, Becky Clarke.
Kitchens are designed to be practical, which is often a good thing, but often they lack any oomph or character. Most are a plain neutral colour – white, cream, grey or wood that on first inspection might seem boring, but look at it from another angle and it’s a perfect base on which to add an eye-catching accent. You can completely change the feel of a kitchen without a complete refit, a huge budget, or years of DIY skills by adding a beautiful glass splashback and there’s more than one way to use these too. Available in a myriad of amazing colours they are super-easy to fit – did you know they are self-adhesive so literally stick to a wall? Yes, it really is that simple. By nature, glass brings an expensive look to even the most humble kitchen so choose your favourite colour and add life to your kitchen today!
Where do I start?
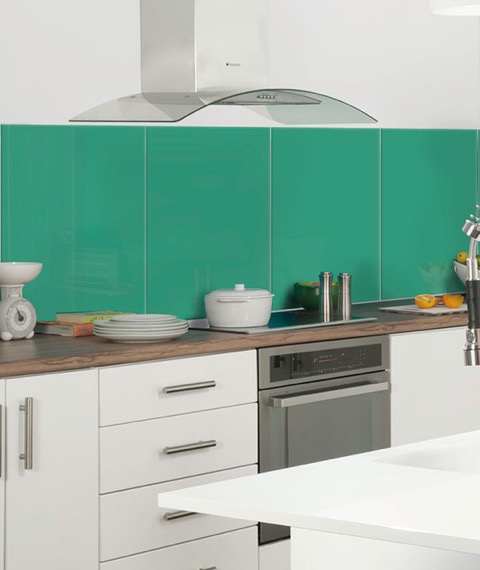
Fit a splashback behind the hob
This large space will be a real focal point once you’ve fitted a fabulous glass splashback. Not only will it look better, but the glass protects the wall too and the flat surface means splashes are easy to wipe away. Brightly contrasting colours are cheerful, alternatively use grey or navy for a calmer, more elegant finish or chalky tones if you favour a more country feel. Cookers come in standard sizes and splashbacks are the same so simply buy one the width of your appliance and fit it behind the hob - what could be easier? Make sure the wall is clean then remove the backing paper from the glass and stick it to the wall. Be careful to make sure it’s perfectly central and straight because once it’s stuck, it’s stuck!
Don’t stop at one!
For maximum impact use several splashbacks across the width of the room so the wall behind sink and hob as well as near work areas are covered. These will be fast to fit, look amazing (the expanse will make the room look bigger), protect your wall, be easy to clean and give the room an incredible high-end look. Use a rich aqua with white for a fresh look, consider marble-look for a more traditional feel, or go metallic for an opulent, exciting finish.
Introduce some pattern

As an alternative, patterned tiles can look amazing when used to create a splashback and the designs disguise debris meaning you don’t have to clean continuously to maintain a lovely look. Tiles are particularly good if you have a tricky size space to cover as ceramic tiles can be cut to size whereas glass can’t be trimmed to fit and it’s easy to extend the tiles around the rest of the kitchen if desired. For a bespoke look, check the Internet for tutorials explaining how to make your own splashback covering a wallpaper like this dragonfly example with clear glass.
Finishing Touches
Once you’ve fitted your lovely new splashback, there are a few extra touches that will complete the room’s transformation.
Replace the kitchen handles
Take off boring knobs and screw on new ones such as hand painted ceramic, beautiful glass or vintage metal. You won’t believe how much impact such a simple detail will have.
Put up a shelf
Open shelves offer storage without taking up too much space. Display pretty ceramics or attractive storage jars to enjoy your treasures rather than hiding them away in a cupboard.
Kitchen glass splashback
Find a splashback to match your kitchen style, Shop the full Impact Splashbacks range here