Upcycling a bookcase for National Tile Week by Julia Kendell
Share

To mark National Tile Week 2017, I have been tasked with upcycling a tired and dated bookcase into a colourful, Gaudi-inspired piece to show just how versatile tiles can be!
Back for its second year, National Tile Week is a celebration of the diversity and fabulous range of tiles made in the UK and of British design. I have long advocated tiles as a superior surface material throughout the home, not just restricted to kitchens and bathrooms. The colour and texture they provide is unlike any other material and is a tried and tested go-to surface product for many interior designers. National Tile Week is a perfect opportunity to discover new ideas for using tiles to create beautiful interiors.
I have really enjoyed trying a different technique using tiles to upcycle an old bookcase and hope you like the results! Follow my step-by-step guide to try a similar project, and take a look at the wonderful ideas of our guest bloggers [-] who have all been working on their own projects in collaboration with British Ceramic Tile and National Tile Week.
The Project…
The strength of colour and depth of finish of a tile goes way beyond any paint finish and is a great choice for creating a stand-out, bespoke piece of furniture. I wanted to create a Gaudi-inspired, ‘trencadis’ piece using left-over tiles that anyone could easily copy and requiring no tile cutting. My first task was to find an appropriate piece of furniture to upcycle and this old, pine bookcase fits the bill perfectly! It has a solid back and is a sturdy piece, required to support the additional weight of the tiles. Found for a few pounds locally at a second-hand shop, I couldn’t wait to get it home to start its transformation.
For the prep and paintwork I used…
- Sandpaper and block or electric sander
- Furniture chalk-paint (or acrylic eggshell can also be used)
- Brush
- Wax
- Cloth
- Goggles, face-mask & gloves

Step 1
Depending on the finish of the furniture and the paint you’re using, most will require sanding down to provide a suitable surface to take the paint. Note, varnished and waxed surfaces need a good sanding to provide a matt finish or the paint might easily chip off. Check the paint manufacturer’s instructions to see whether a primer coat is needed first.

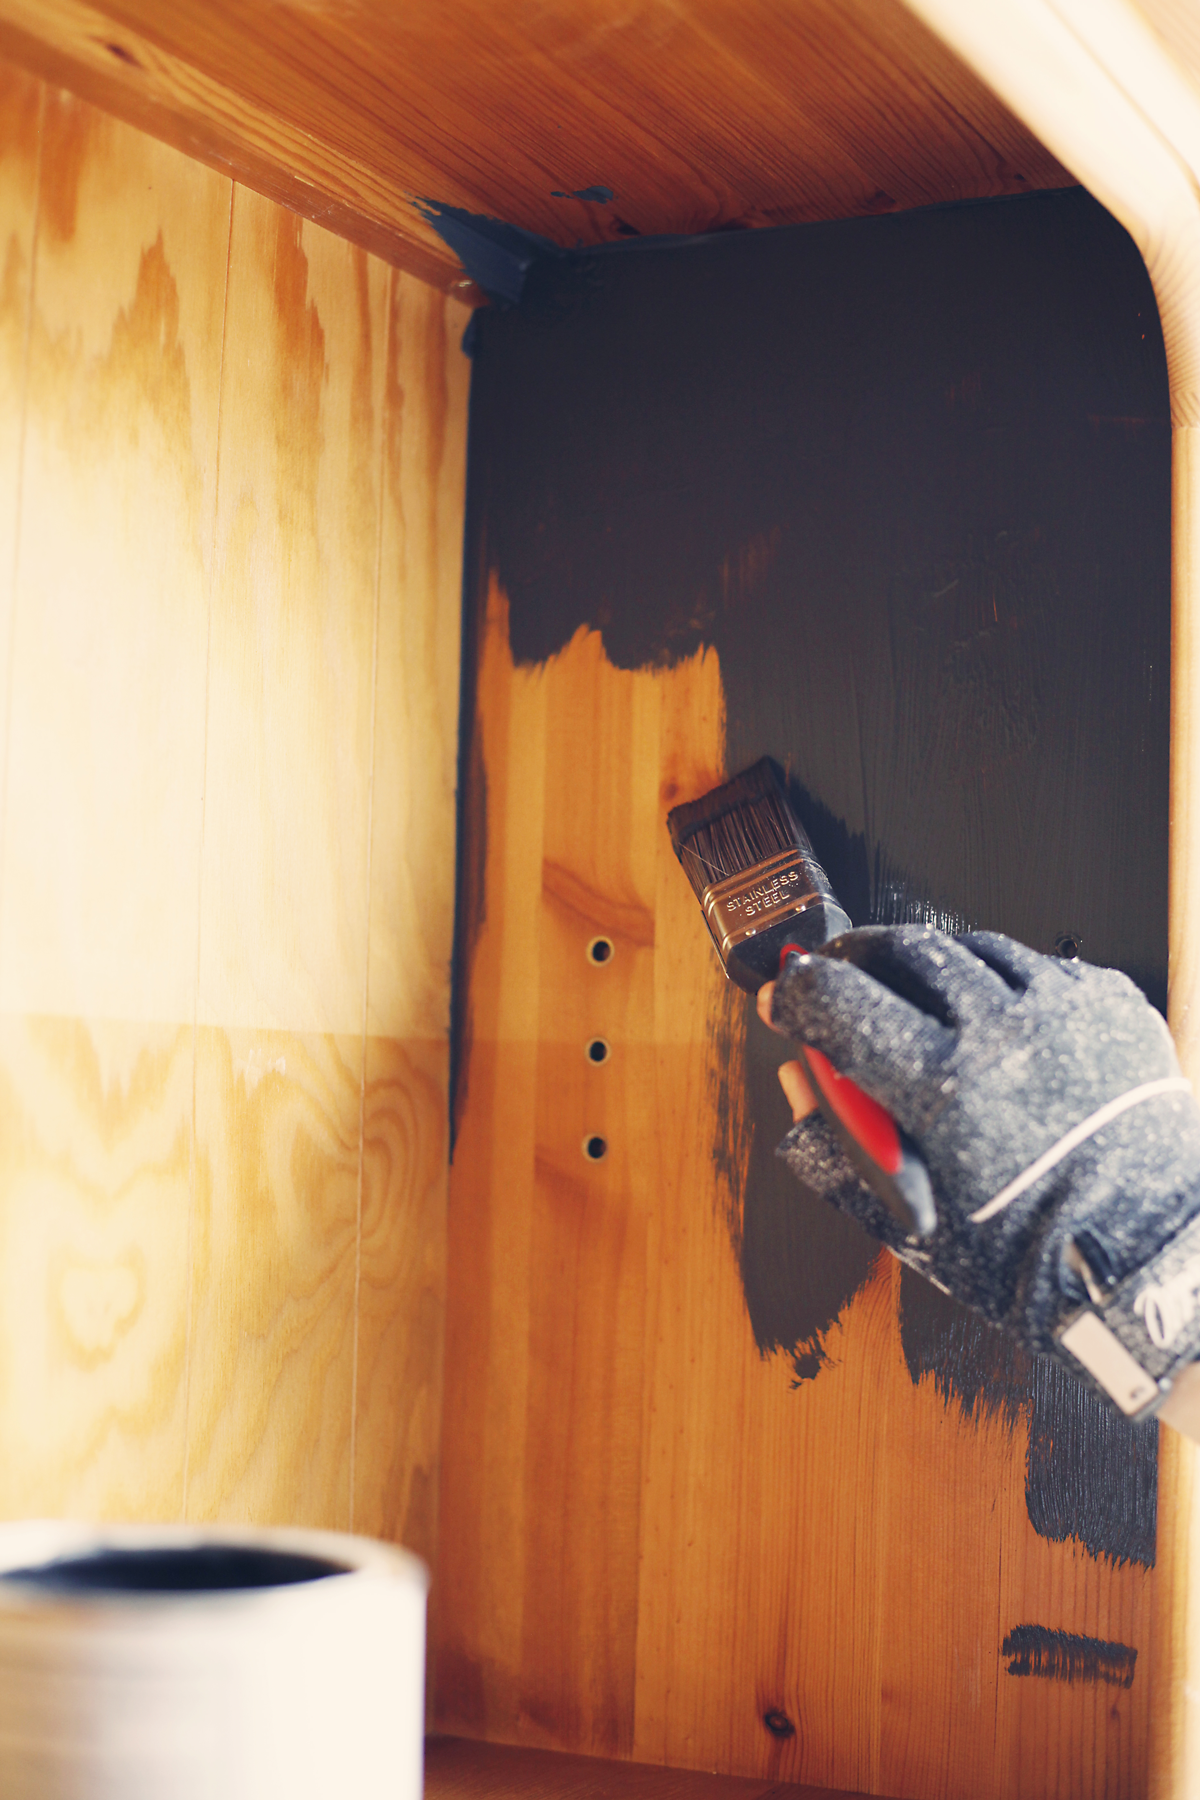
Step 2
To paint, start at the top of the piece and work down with an even coat ensuring you get into all the crevices. Allow to dry and apply a second coat for perfect coverage.
Step 3
Depending on the paint used, apply one coat of a suitable finish coat to seal the paint. I used furniture wax applied with a cloth. This will protect the paintwork from the tile grout and save additional work touching up later.
For the fun, tiling bit I used…
- A selection of tiles
- Hammer
- No-More Nails or similar adhesive
- Flexible Grout and applicating tool
- Sponge and bucket of water
- Goggles, face-mask & gloves (These are vital for health and safety!)
Step 4
Using a hammer, and ensuring you are wearing your eye goggles and gloves, lightly hammer the backs of the tiles on a sturdy surface to break to the sizes required. Note – it can be helpful to put the tiles in an old pillowcase as you hammer them to stop pieces flying around!
Step 5
Work out your tiling layout and design BEFORE you start sticking them down. Working in small sections, apply a dab of adhesive to each tile piece (or in each corner to larger tiles) and press onto surface. Allow to dry.

Step 6
Mix up your grout to the correct consistency. Read the manufacturers instructions for proportions of water and grout powder to use and leave for a few minutes before applying. Working in small sections, use the applicator blade to scrape grout across the surface of the tiles ensuring grout is pushed fully into the cracks between the tiles. Immediately scrape the excess off and allow to dry for the time recommended in the manufacturers instructions. Sponge off any grout from the paintwork.
Step 7
Before the grout is fully dry, use a damp sponge to remove any excess grout from the tiled surface and smooth the surface of the grout.
Final step…
When completely dry, buff the tiles with a clean cloth 'til they sparkle and, if required, add a further layer of wax to the paintwork and buff to complete the transformation.
Julia’s Top Tips
- Choose tiles of the same thickness to make it easier to grout.
- Add in iridescent mosaics for sparkle and depth.
- When mixing the grout, add water to the powder rather than the other way round. You can always add more water but if the mixture is too sloppy you can only rescue it with more powder (which might mean another trip to the shops!) The consistency should be like sponge cake mixture. If you are transforming a tall piece of furniture, fix it to the wall to prevent it toppling with the additional weight of the tiles.
